
Appearance
Sales tracking & detection
Crosslist helps you keep track of your sales across all connected marketplaces.
Sales tracking gives you a centralized overview of your revenue, fees, expenses, and estimated profit or loss for each transaction. You can rely on automatic sales detection where supported, manually add sales yourself, or enrich existing sales with additional financial information.
Automatic sales capture
Crosslist periodically checks your connected marketplaces for new sales and automatically imports them into your account.
Sales can take up to 15 minutes to be detected, except for Vinted, where detection can take up to 30 minutes.
Note: Vinted is only available to users who connected it before Sep 23,2026.
WARNING
Crosslist can only track sales for listings that are linked in Crosslist, meaning Crosslist has the marketplace URL for that listing. Unlinked listings won't be detected, even if they're on a supported marketplace.
Cloud-based automatic sales tracking
For the following marketplaces, sales tracking happens fully automatically through our servers:
- eBay
- Depop
- Etsy
- Shopify
- WooCommerce
Your browser and computer does not need to stay open for these marketplaces.
Chrome extension-based sales tracking
For all other marketplaces, automatic sales tracking requires:
- The Crosslist Chrome extension
- A desktop browser session
- Your computer/browser to periodically remain active
Crosslist checks for new sales:
- Whenever you actively use your browser
- Periodically while your browser remains open
View sales for a listing
There are 2 ways to access the sales history for a listing.
From the listing overview
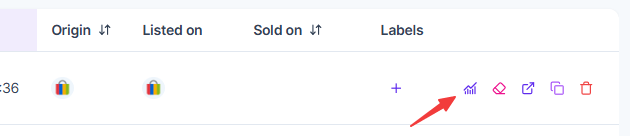
- Navigate to the Crosslist listing overview
- Locate the listing you want to inspect
- Click the bar chart icon next to the listing
From the listing detail page
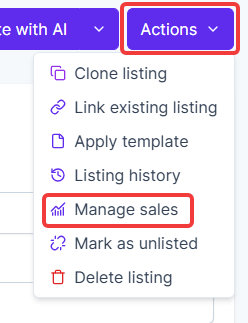
- Open the detail page of a listing
- Click the Actions dropdown in the top right of the page
- Select Manage sales
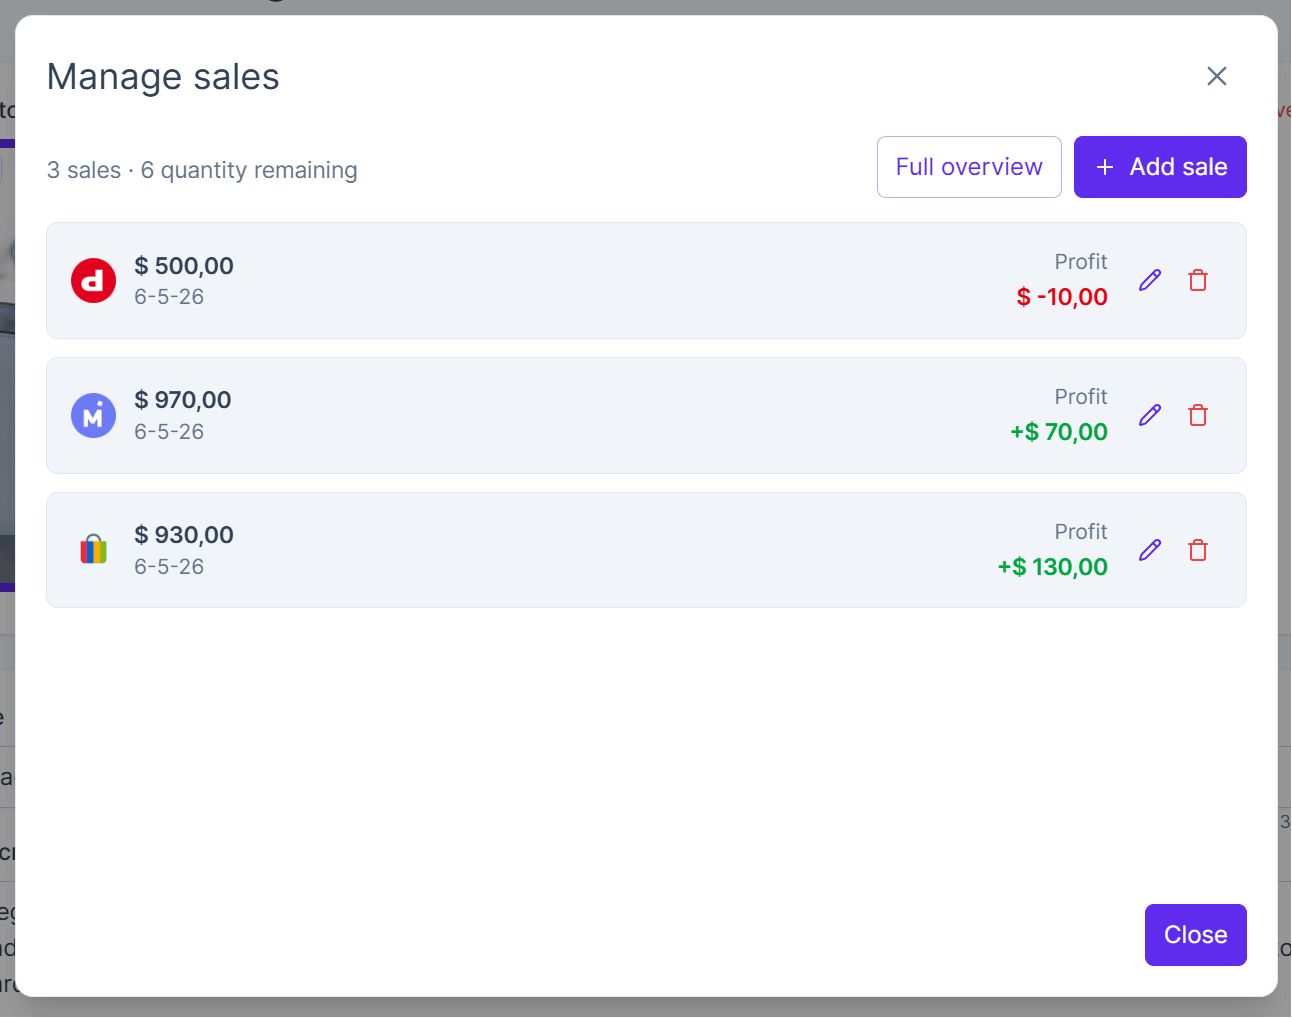
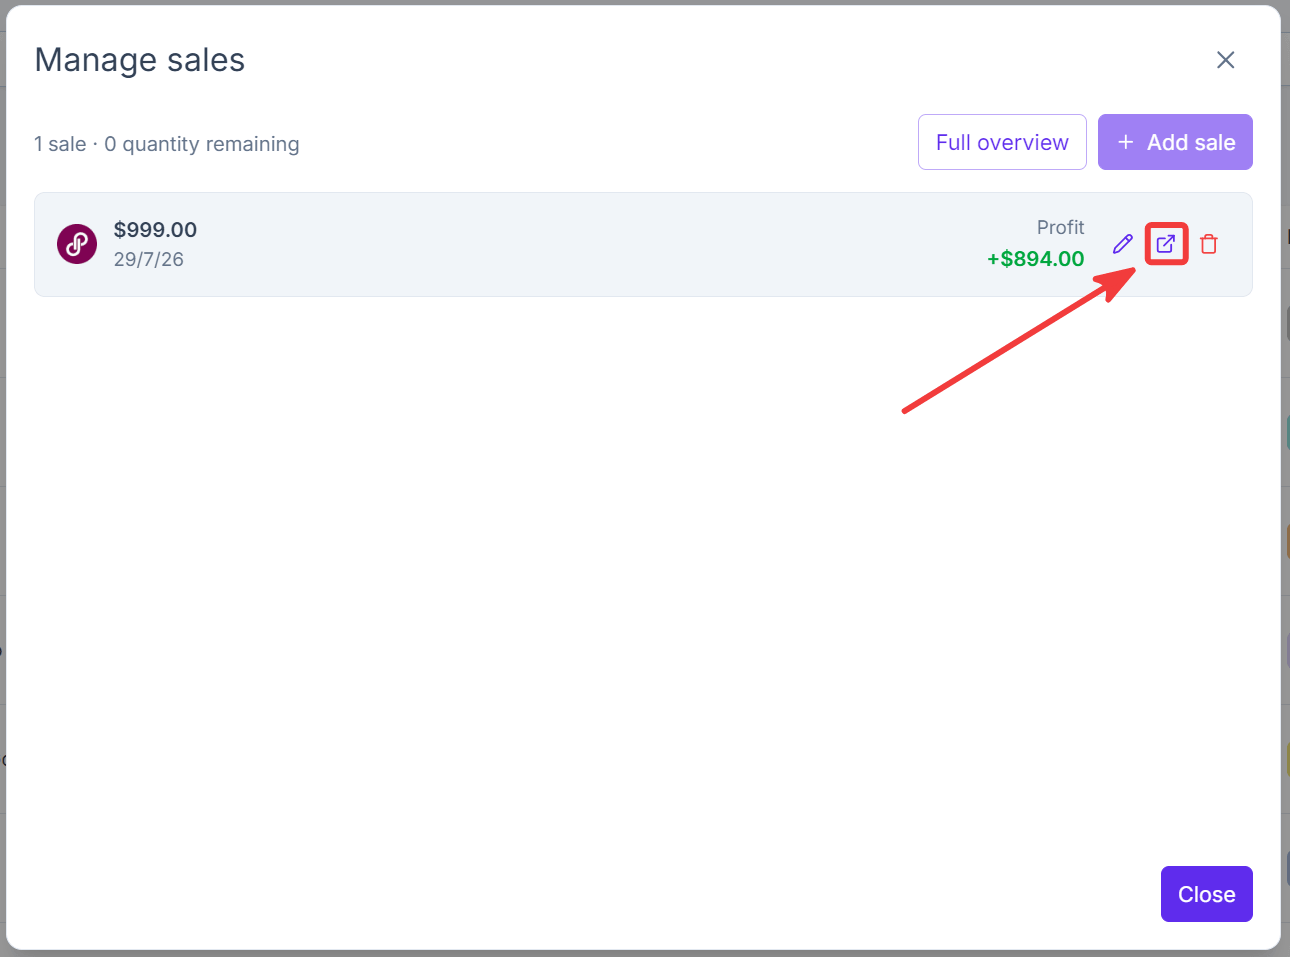
A sales management modal will open where you can:
- View all recorded sales for the listing
- See the sale date, revenue, fees, and estimated profit or loss
- Edit existing sales
- Delete sales
- Add new sales manually
INFO
Click the external link icon next to a sale to open that order's page directly on the marketplace where it was sold.
WARNING
Once a sale has been saved, you can't change the marketplace where the sale occured anymore. If you want to change the marketplace, delete the sale and create a new one with the other marketplace.
Add a sale manually
You can manually add a sale at any time.
This is useful when:
- A marketplace is not yet supported for automatic sales tracking
- You made an in-person or local sale
- You want to backfill historical sales
- You want to adjust or complete missing financial details
To manually add a sale:
- Open the Manage sales modal
- Click Add sale
- Fill in the desired sale information
- Click Save
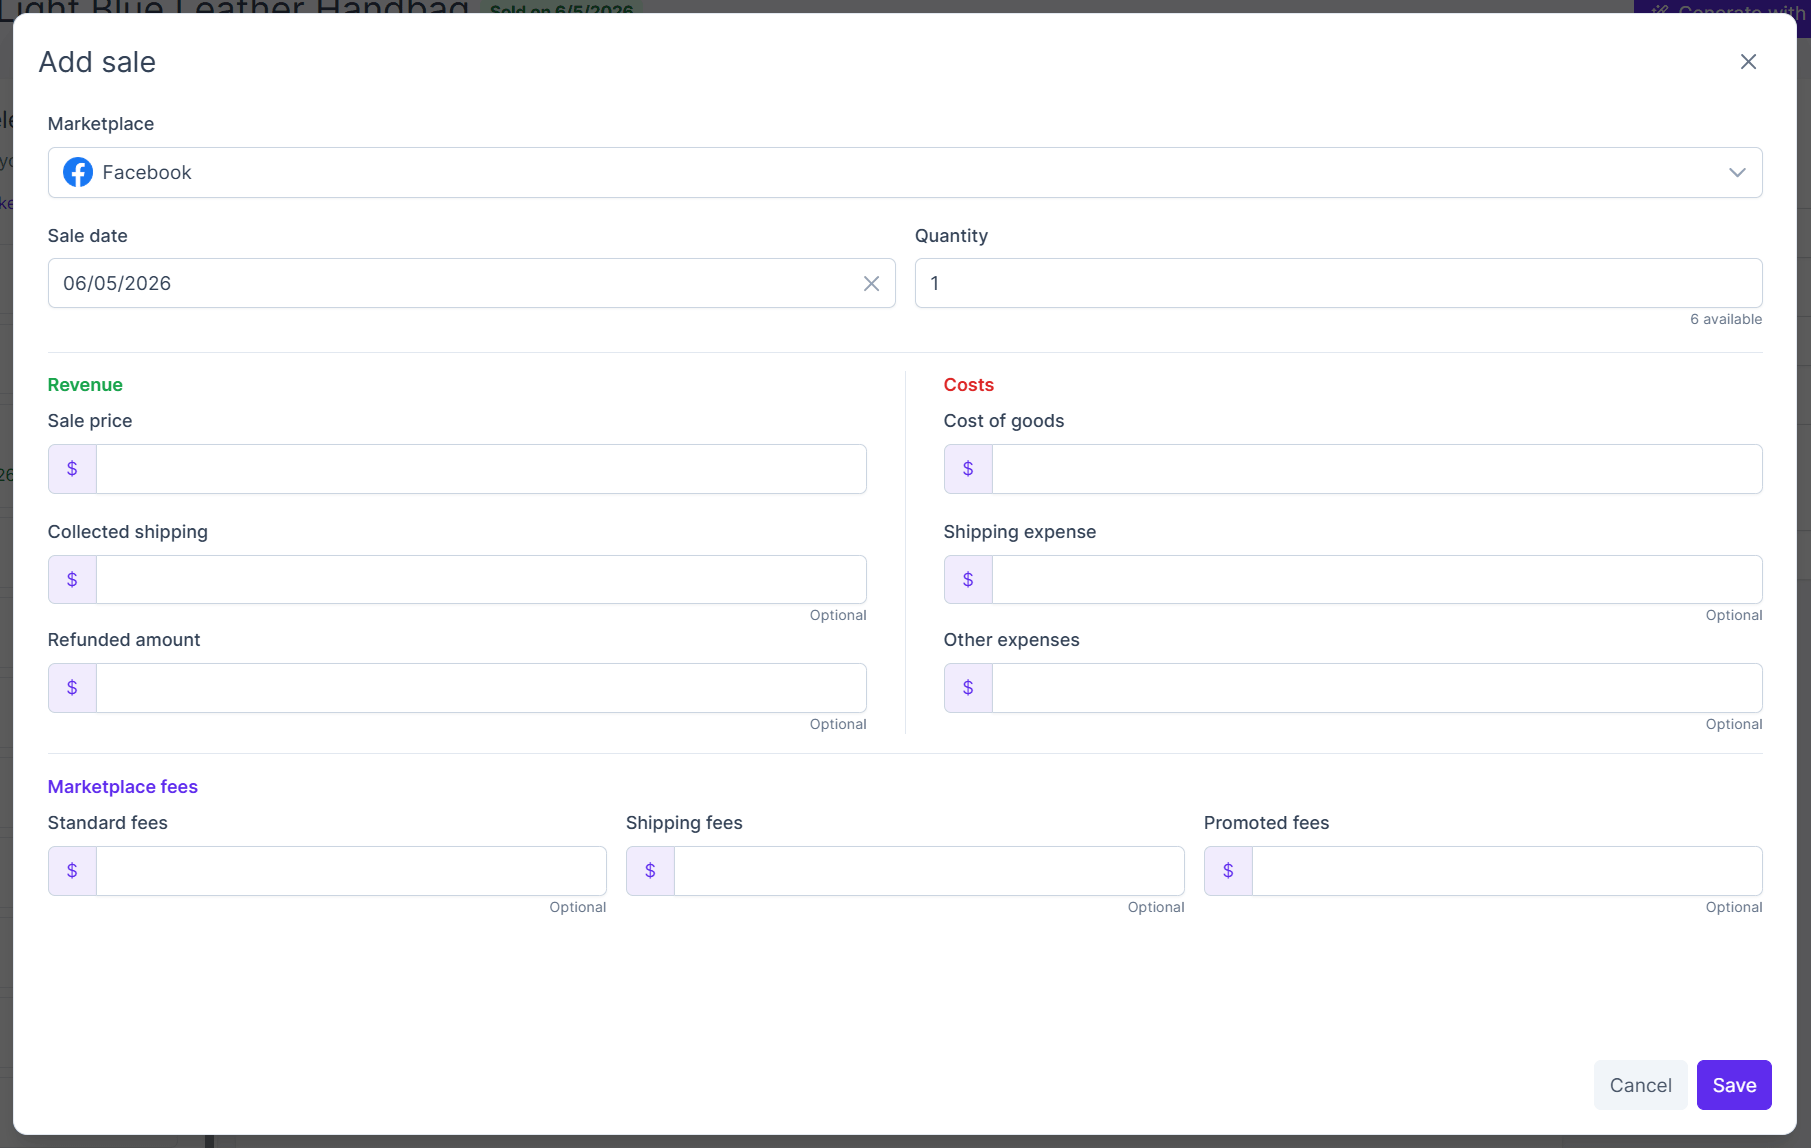
Sale fields
| Field | Required | Explanation |
|---|---|---|
| Marketplace | Yes | Select the marketplace where the item was sold. This helps track where your sales are coming from and powers marketplace-specific analytics. |
| Sale date | Yes | The date the sale happened. Used for sales reporting, analytics, and tracking trends over time. Defaults to current date |
| Quantity | Yes | The number of units sold in this transaction. If the item has multiple units available, this lets you record a partial sale instead of marking the entire inventory as sold. Defaults to 1. |
| Sale price | Yes | The amount the buyer paid for the item itself, excluding shipping. This is your gross item revenue before fees and expenses. |
| Collected shipping | No | The amount the buyer paid for shipping. Enter this only if shipping was charged separately and should be included in revenue tracking. |
| Refunded amount | No | Any amount refunded to the buyer. Useful for partial refunds, returns, cancellations, or post-sale discounts. |
| Cost of goods | Yes | How much you originally paid for the item. Used to calculate estimated profit and margin. Defaults to the listing's cost of goods field. |
| Shipping expense | No | What you paid to ship the item to the buyer. Used for more accurate profit calculations. |
| Other expenses | No | Any additional costs related to the sale, such as packaging materials, cleaning costs, insurance, or transaction-related expenses. |
| Standard fees | No | The marketplace’s normal selling fees, such as commissions, final value fees, or transaction fees. |
| Shipping fees | No | Marketplace shipping-related fees deducted from your payout, separate from your own shipping expense. |
| Promoted fees | No | Advertising or promoted listing fees charged by the marketplace, such as promoted listing fees or offsite advertising fees. |
WARNING
You can only add sales if the listing quantity is greater than 0.
If your listing quantity is currently 0, first adjust the quantity in the listing detail form before creating the sale.
Profit calculation
Crosslist automatically calculates the estimated profit or loss for a sale based on the information you provide.
This can include:
- Sale price
- Shipping collected
- Marketplace fees
- Shipping expenses
- Cost of goods
- Refunds
- Additional expenses
Providing more complete financial data will result in more accurate profit reporting and analytics.
Import historic sales
Crosslist also allows you to import historical sales that happened before sales tracking was active, or sales that were missed by the tracking system.
To import historical sales:
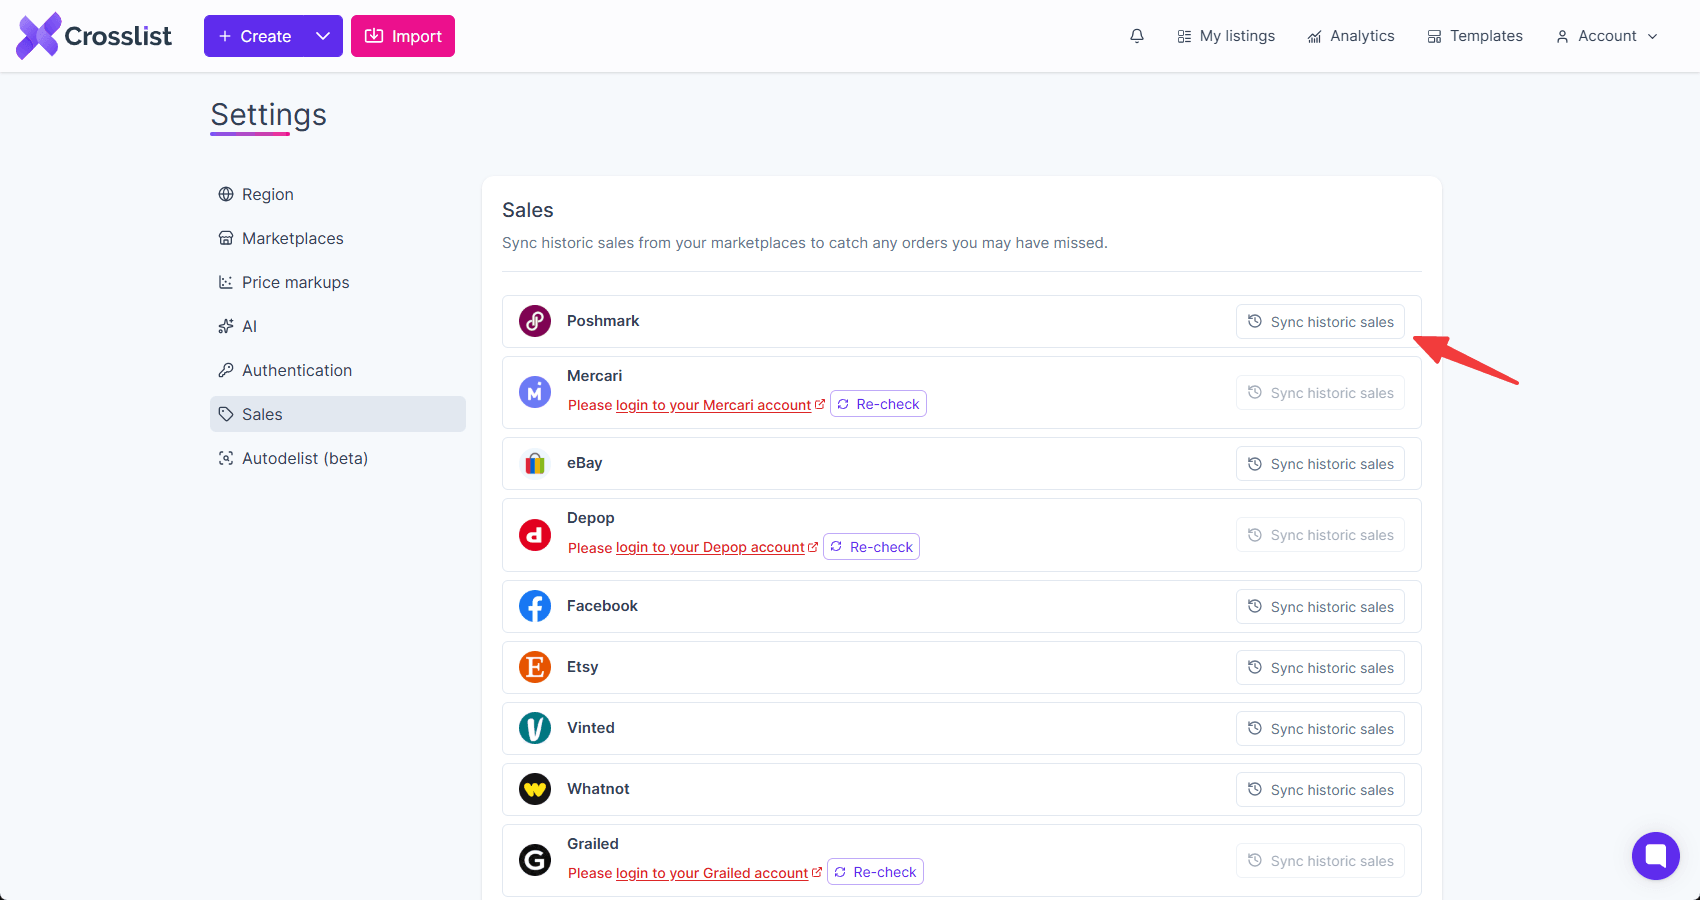
- Navigate to the Sales section on the settings page.
- Make sure you are signed in or connected to the desired marketplace.
- Click the Sync historical sales button next to the marketplace.
- Toggle Clear manual sales for this period if you want to remove manually added sales from the last 3 months for this marketplace before importing.
- Click Start sync to start the sales import. This can take a few minutes, depending on how many sales need to be imported. Keep the app open until the sync is complete.
Crosslist will import historical sales from the last 3 months, up to a maximum of 500 sales to prevent marketplace rate limits.