Appearance
Creating a listing template
If you sell items with common characteristics, setting up listing templates can save you time and effort.
Listing templates allow you to pre-fill parts of the listing form, so you don’t have to start from scratch every time you create a new listing.
For example, if you frequently list Men’s T-shirts on Poshmark and Mercari in excellent condition, you could create a template with Poshmark and Mercari preselected, along with the category and condition already filled in.
This feature is a major time-saver for many users. To create and use a listing template, follow the steps below.
INFO
Listing templates are also used when editing listings in bulk. Click here for more information.
Step 1: Create a listing template
To create a template, first navigate to the templates manager by clicking the Templates button.

Then, click the Create new template button.
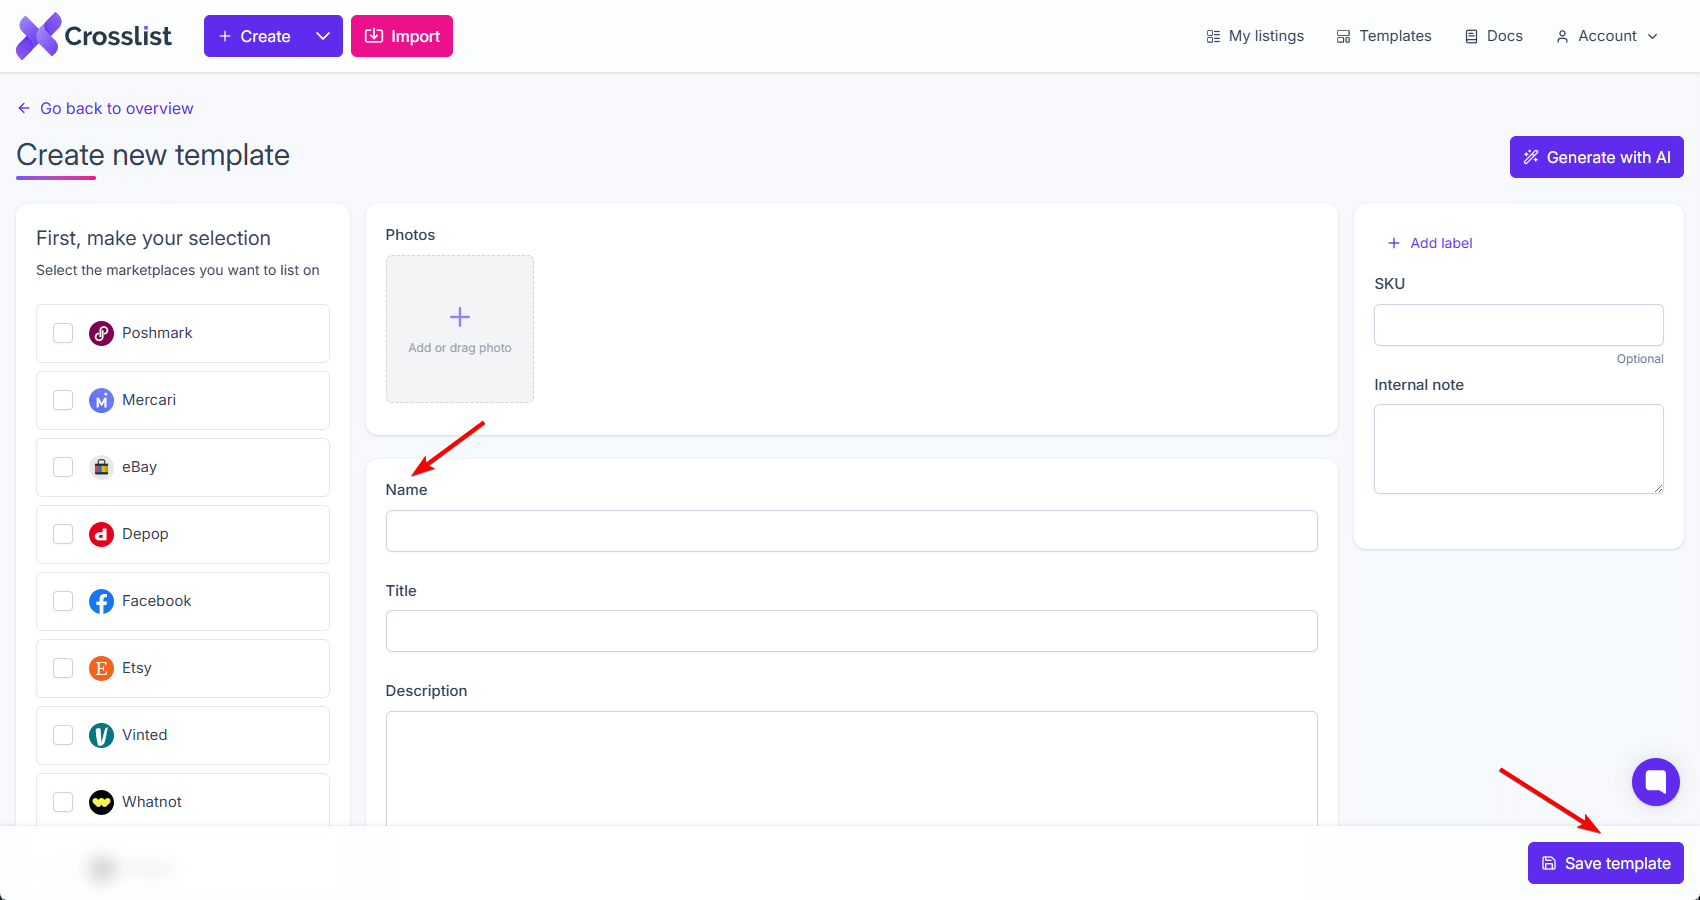
Step 2: Complete your listing template
You’ll now see the same listing form you’d use to create a new listing.
Here, fill in the shared listing information you want to reuse across products.
You can also add an image that appears in all listings using this template — for example, a business logo or size chart.
Finally, give your template a descriptive name.
Click the Save template button in the bottom-right corner to save your template.
You’ve now successfully created and saved a listing template.
INFO
There’s no limit to the number of listing templates you can create.
Step 3: Use your listing template
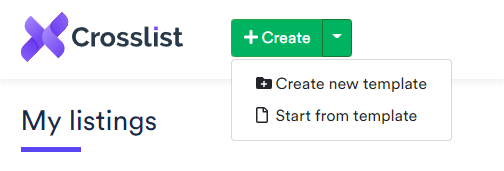
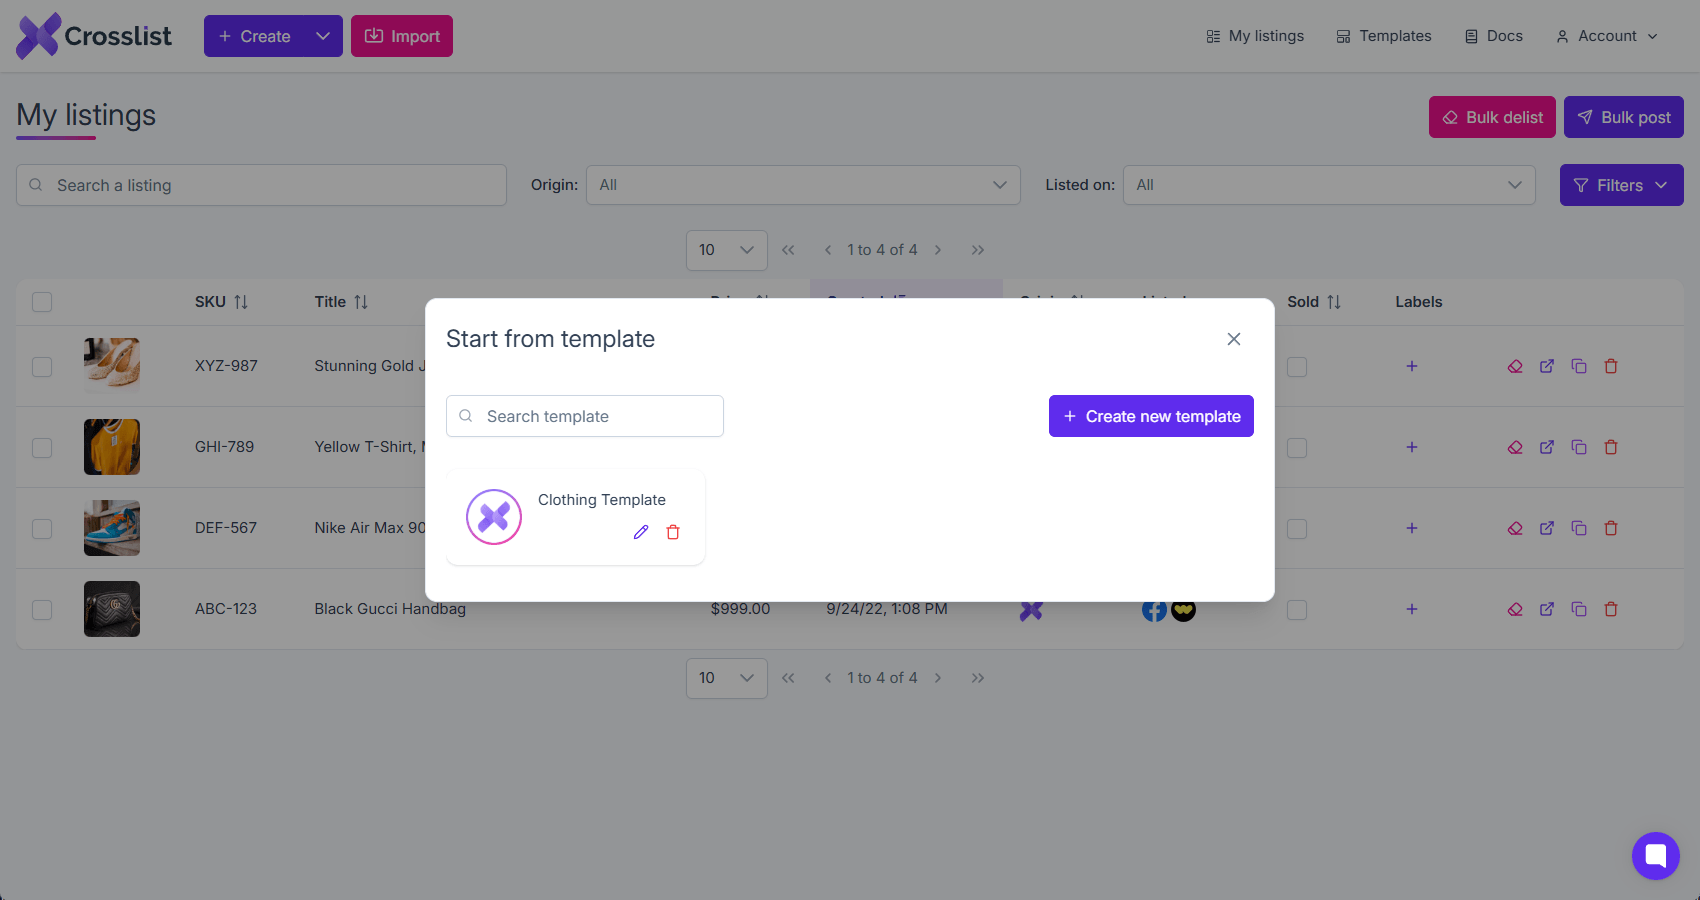
To start a new listing from a template, click the arrow next to the Create button and choose Start from template from the dropdown.

A pop-up will appear where you can select the listing template you want to use.
Managing existing templates
To manage your templates, open the templates manager by clicking the Templates button in the top-right corner of your screen.