Appearance
Filter your listings
Filters help you quickly narrow down your listings so you can find items, review statuses, and run bulk actions with less scrolling.
You can combine search, dropdowns, and filters. Your results update as you change filters.
Open and close filters
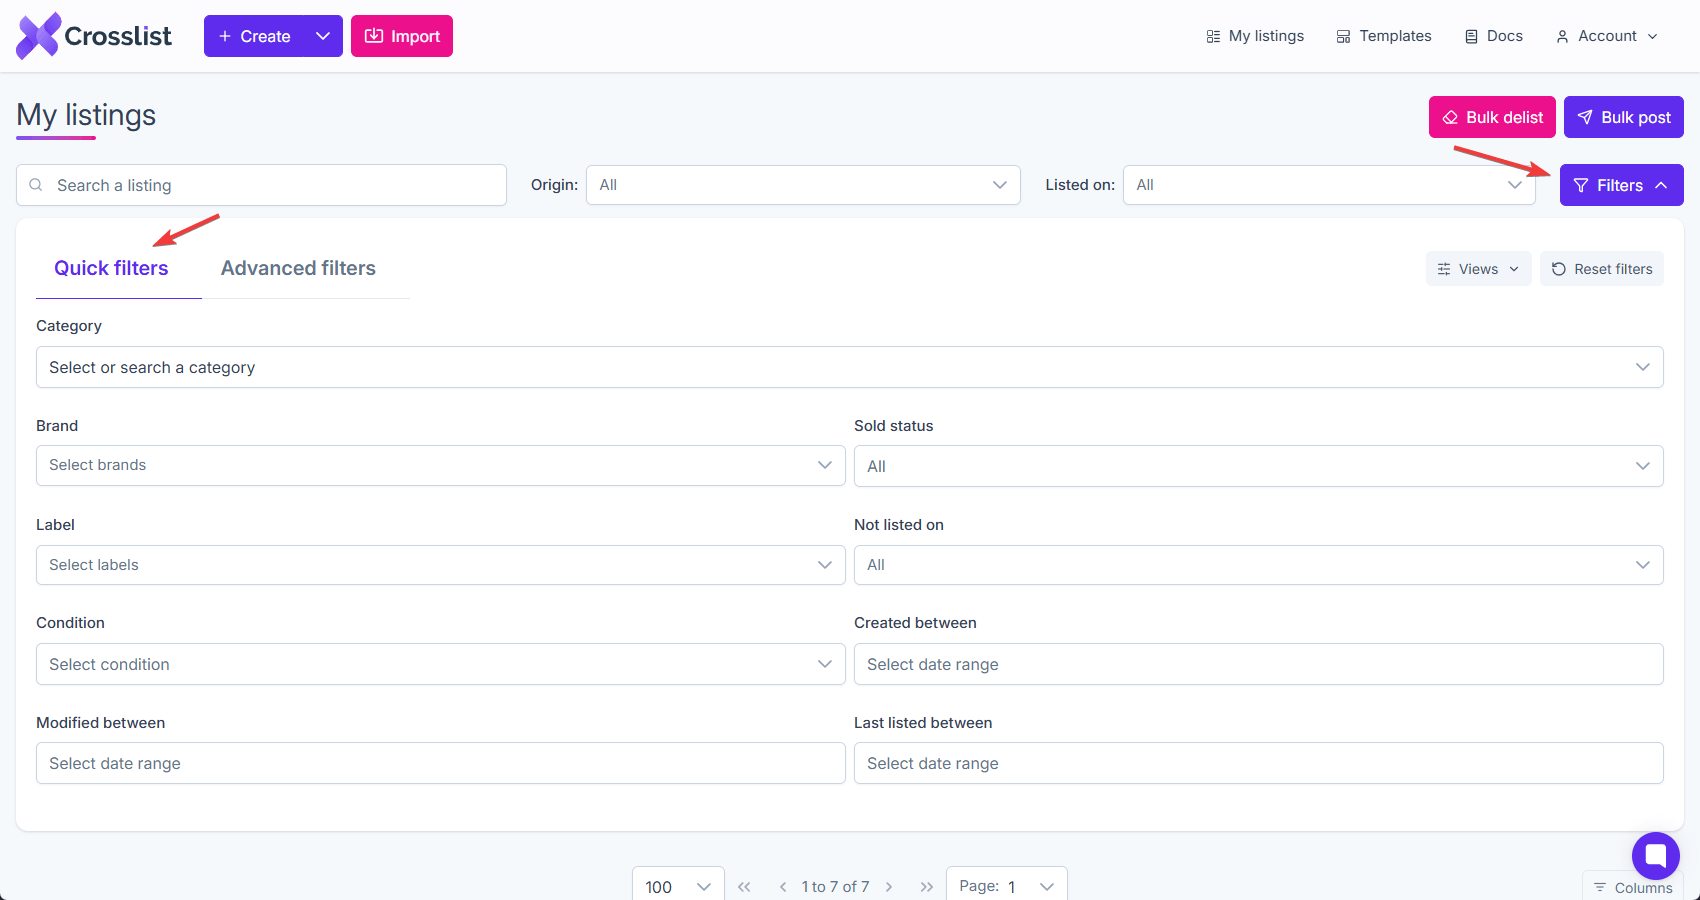
Go to My listings.
Click Filters in the top-right of the page.
Use the tabs:
- Quick filters for common fields
- Advanced filters to build custom rules
If you already have filters applied, you may see a small number badge on Filters. This shows how many filters are currently active.
Click Reset filters to remove all active filters and return to the full list.
Top bar filters
These sit above the filter panel and work alongside it.
Search a listing: Use the Search a listing field to find listings by keyword. This is the fastest way to jump to a specific item.
Origin: Use Origin to filter by where the listing came from (for example, created in Crosslist or imported, depending on your setup).
Listed on: Use Listed on to show only listings that are posted to a specific marketplace.
Quick filters
Use Quick filters when you want to filter on the most common listing fields without building rules.
Category: Use Category to select a category, or type to search categories.
Brand: Use Brand to select one or more brands.
Label: Use Label to filter by one or more labels you assigned to listings.
Condition: Use Condition to show listings with a specific condition.
Sold status: Use Sold status to show sold or unsold listings. Leave it on All to include everything.
Not listed on: Use Not listed on to find listings that are missing from a marketplace. This is useful when you want to post to a new channel or fill gaps.
Created between: filters by when the listing was created.
Modified between: filters by when the listing was last edited.
Last listed between: filters by the last time the listing was posted to any marketplace.
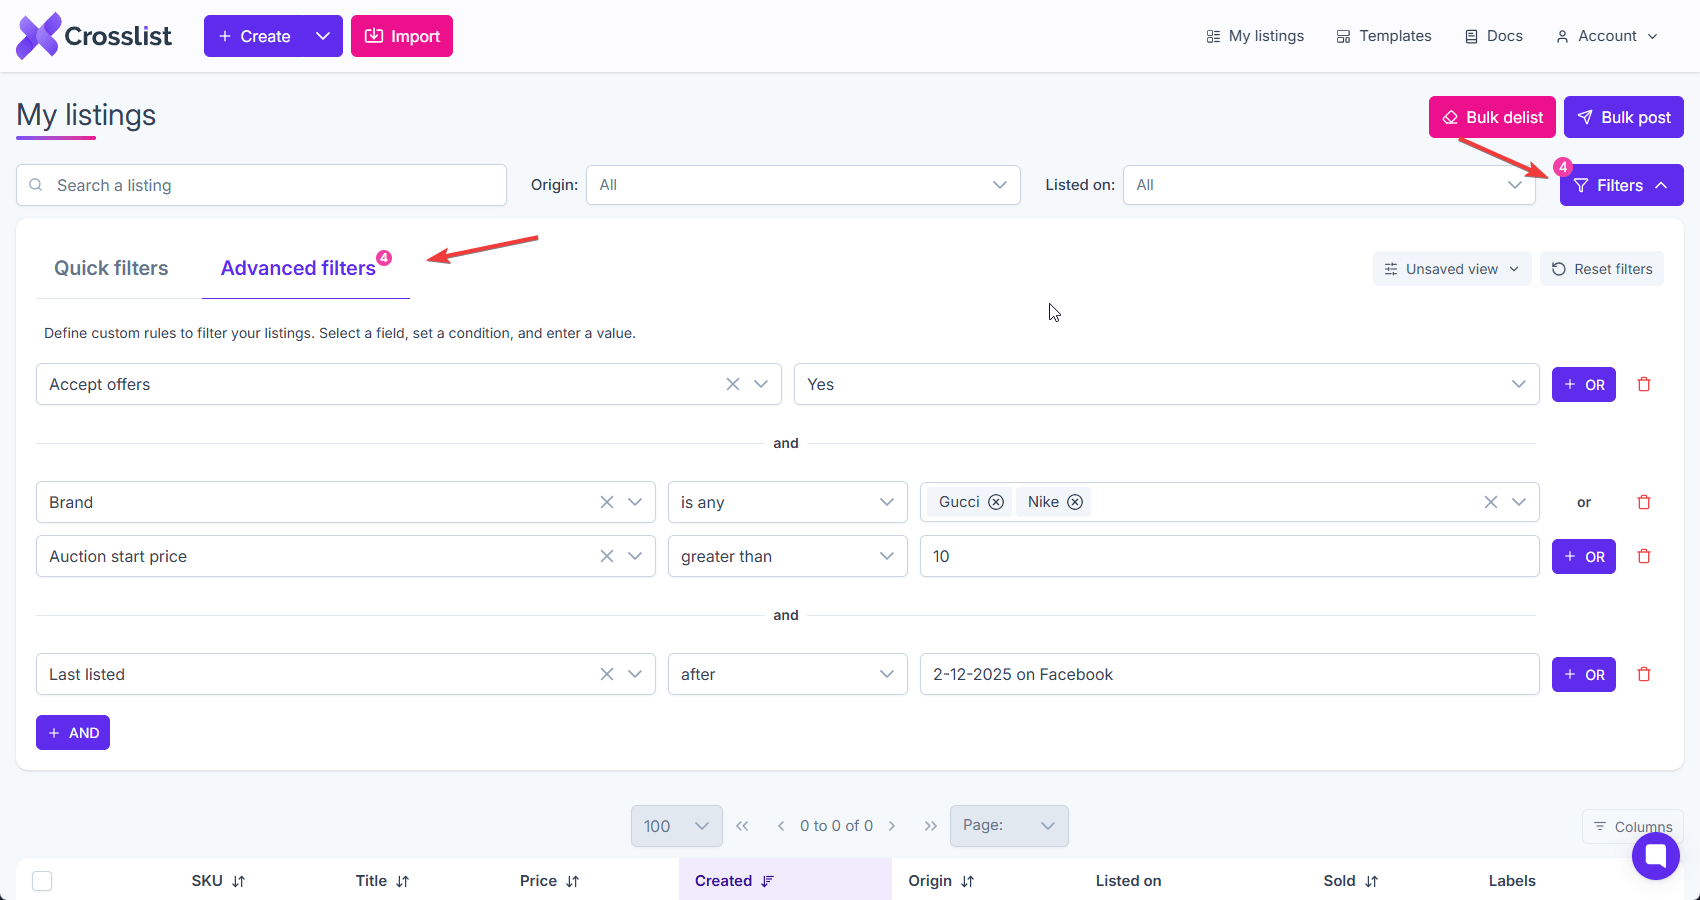
Advanced filters
Use Advanced filters to build custom rules when quick filters are not enough. You choose a field, pick a condition, and enter a value.
You can combine rules with AND and OR.
Build a rule
- In the left dropdown, select a field (for example, Accept offers, Brand, Auction start price).
- In the next dropdown, choose a condition (for example, is, is any, greater than).
- Enter or select a value.
Your results update as you add or change rules.
Combine rules with AND
Use + AND to add another rule that must also match.
If you add multiple rows with AND, a listing must satisfy every row to appear in the results.
Combine rules with OR
Use + OR to add an alternative within the same level.
OR is useful when you want to match any of several values or rules, such as:
- Brand is any of multiple brands
- Price is greater than X or less than Y
- A field matches one of several states
Remove a rule
- Click the trash icon next to a rule to delete it.
- Click the x inside a field to clear that selection.
INFO
Before using Bulk delist or Bulk post, double-check your filters so you act on the right set of listings.
Filter views
Filter views let you save a set of filters so you can reuse it later. This is useful if you often work on the same subset of listings (for example, items not listed on a specific marketplace, or items that match a certain pricing rule).
Open filter views
- Open My listings.
- Click Filters.
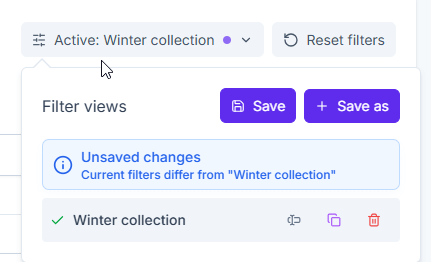
- Click the Views dropdown in the top-right of the filter panel.
You will see your saved views, plus an Unsaved view state if your current filters don’t match a saved view.
Save changes to an existing view
If you selected a saved view and then changed any filters, you’ll see an Unsaved changes message.
To update the existing view:
- Open the Views dropdown.
- Click Save.
This overwrites the selected view with your current filters.
Save a new view
To create a new view from your current filters:
- Open the Views dropdown.
- Click Save as.
- Enter a name for the new view.
Your new view will appear in the list and can be selected anytime.
What “Unsaved changes” means
When you see Unsaved changes, it means your current filters differ from the selected view. You can either:
- Click Save to update that view, or
- Click Save as to create a new view and keep the original unchanged
Delete a view
In the Views dropdown, click the trash icon next to a view to delete it.
Rename a view
In the Views dropdown, click the rename (input) icon next to the view, update the name, then click the green checkmark to save or the x to cancel.
Clone a view
In the Views dropdown, click the duplicate icon next to a view, enter a name for the new view, then confirm. The cloned view is created and automatically selected.